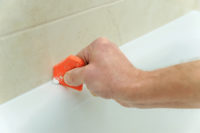
Is the caulking in your bathroom starting to split and whither away? This can make any bathroom look dirtier and older than it really is. Before you go ahead and re-caulk your bathtub, make sure you completely remove the old caulking before you add more.
Phase 1: Softening
Sure, you can go ahead with removing the caulking as it lies, but the removal won’t be as clean. Instead, apply a caulk remover to the old and depleted caulking. You should wait a minimum of two hours for it to work its magic, but 24 hours is ideal.
Phase 2: Removal
Now that the caulking has been softened, it’s time to grab your tools for removal. Avoid using a utility knife unless you’re a pro because you could end up damaging your bathtub or the tile. The safest route is using a caulk remover tool that you can pick up at the local hardware store.
Phase 3: Cleaning Up
All of the caulking can usually be removed in big, clean pieces if you’re skilled enough (and lucky). Whether it was removed cleanly or it was a downright mess, there will usually be small bits and pieces left between the bathtub and tile. Use a toothbrush to brush away any remaining residue.
Phase 4: Sterilization
The old caulking is out, but before you even think of applying more you should sterilize the areas. First, clean the surface with alcohol. After that dries, wash the area down with a solution of one part bleach and three parts water. This will kill any mold and mildew that might lie within the crack.
A full removal of old caulking is necessary before any new materials are applied. When providing maintenance to your bathrooms, make sure all plumbing is leak-free and working properly. When you need a plumber you can count on, Len The Plumber will take care of you! Check to see if you live in one of our many service areas!
The post How to Remove Old Bathroom Caulk appeared first on Len The Plumber.

No comments:
Post a Comment